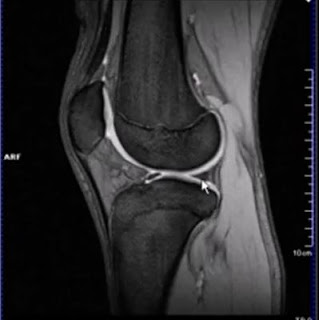
MRI Scan of the Knee
Carry out all safety checks before bringing the patient into
the scanner room. Help patient to lie supine on the scanner table with the
affected knee on the dedicated knee coil. The apex of the patella should be
about a cm below the center of the coil. Assemble the coil and place the pads between
the knee and the coil to help the patient to keep still.
Provide the patient with an emergency button. Provide ear
protection to reduce scanner noise according to your manufacturer guidelines, headphone
will also enable communication with the patient during the scan.
Move the table and center the laser beam localizer over the lower
border of the patella. Move the patient into the scanner making sure that the
patient is calm and comfortable before leaving the room.
 |
| Localizer on lower border of patella. |
Once your back in control room select the correct patient
details in the browser or you can type the name manually if necessary. It is very
important to get the patient details right including the patients weight so
that the image can be calculated accurately.
Register the patient as lying feet first and supine. Choose
the appropriate knee protocol according to your hospital and radiologist
guidelines.
Scanning Sequences
Begin the scan with an axial localizer sequence. From the
axial localizer you can plan the sagittal and coronal localizer parallel and
perpendicular to the medial and lateral condyles.
In this protocol the first diagnostic sequence is the proton
density or PD fat saturated axial.
PD Fat Saturated Sequences Sagittal
On the sagittal localizer, angle the positioning box
perpendicular to the line through the long axis to femur and tibia, make sure
the block covers the area from above the patella and to tibial tuberosity.
 |
| Sagittal Localizer |
Coronal Localizer
On the coronal view angle the slices parallel to tibial plateau. Using the saturation bands above and below the axial block
will further reduce arterial pulsation artifacts.
 |
| Coronal Localizer |
Axial Localizer
Center the axial localizer in the field of view, the face
direction in the axial scan should be right to left. This is to avoid pulsation
artifacts from popliteal artery.
 |
| Axial Localizer |
PD Fat Saturated Sequence Routine
After scanning the localizer plan your PD fat saturated coronal sequence on the newly
acquired axial image.
Slices should cover the knee joint from patella anteriorly to
popliteal artery posteriorly.
Slices should run parallel to the posterior border of the femoral
condyles.
Sagital view the slices should plan parallel to the midline
of femur and tibia. Use saturation band above and below to reduce pulsation
artifacts.
Check your planning and apply.
 |
| PD Fat Saturated Planning |
Sagital View sequence.
STIR Sequence
STIR is design to supress the signal from fat.
STIR Planes Planning
Axial plane – plan the slices parallel to the lateral
condyle of the femur, in most cases this could be also parallel to the ACL or anterior
cruciate ligaments. Make sure the planning box is covered form the lateral and
medial condyle.
Coronal View – align the slices parallel to the midline to
the femur and tibia.
Sagital localizer – center the sagittal localizer in the
field of view and apply.
Note: for the subsequent sagittal sequences the slice number
and planning can be just copied from the previous sagittal sequence like the
protocol of T1 and T2 stir sagittal sequences.
After scanning the image you can start the reviewing images.
PD Fat Saturated Axial image – fluid appears bright and fats
appears dark. Most infection and edema in the knee appears bright in this
sequence. This sequence are very useful for visualizing cartilage, ligament and
bony edema.
 |
| PD Fat Sat Axial Image |
PD Fat Saturated Coronal Image – you can see clearly menisci
cartilages as well as the anterior cruciate ligaments and the posterior
cruciate ligaments. In this view allows the best visualization of meniscus tears.
 |
| PD Fat Sat showing Meniscus coronal (arrow) |
 |
| PD Fat Sat Cor. showing ACL (arrow) |
 |
| PD Fat Sat showing PCL (arrow) |
T2 STIR Sagittal Sequences Images
All sagittal sequences allow the visualization of menisci, the
ACL and the PCL along with tears and insufficiencies.
 |
| T2 sagittal (Menisci arrow) |
 |
| T2 sagittal ( ACL arrow) |
 |
| T2 Sagittal PCL (arrow) |
STIR Sagittal Images
Fluids appear bright and fats appears dark. This are useful
for highlighting infection and bony edema.
T1 Sagittal Images
Fluid appears dark fats appear bright. This are useful in
diagnosis in cystic and blood components which if present blood could appear
bright on a T1 scan.
 |
| T1 Sagittal image |
In this sequence fluids appears bright and muscle appears
gray. T2 STIR are very useful for visualizing the menisci and for assessing the
ACL and the PCL.
 |
| T2 STIR sequence |


